Red Velvet Oreo Truffle Brownie Bars Recipe
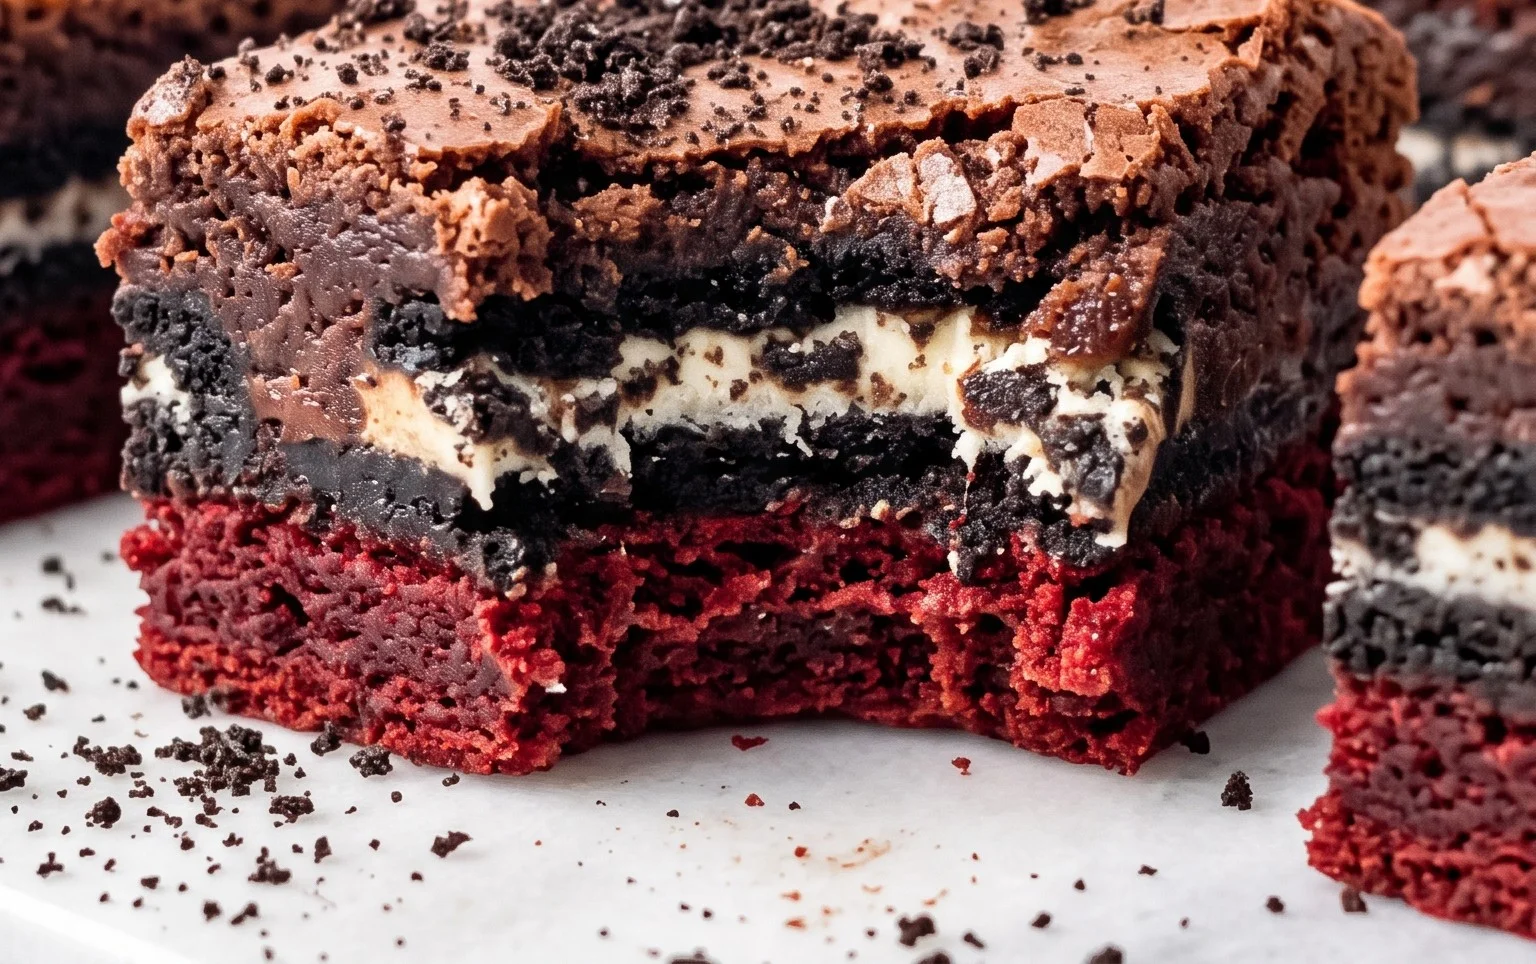
Red Velvet Oreo Truffle Brownie Bars are a serious level-up for dessert. They start with that deep, fudgy brownie base everyone loves, but then things get really interesting. We add a layer of creamy white chocolate Oreo truffle filling that just melts in your mouth. The whole thing gets a marbled swirl of tangy red velvet and is finished with a scattering of mini chocolate chips. It sounds like a lot, but it all comes together perfectly. People go crazy for these because they hit so many dessert cravings at once: the chew of the brownie, the smooth, rich truffle, and that unmistakable red velvet flavor. These aren’t your average brownies; they are a decadent treat designed to impress. If you’re looking for a showstopper that tastes even better than it looks, you’ve found it. This Red Velvet Oreo Truffle Brownie Bar recipe is a winner for holidays, parties, or just when you need a serious chocolate fix.
Ingredients:
- 1 Duncan Hines box Red Velvet cake mix
- 1/2 cup butter (melted)
- 2 eggs
- 1 package Jell-O instant white chocolate pudding (3.3 ounces)
- 6 tablespoons vegetable oil
- 1 package Oreos
- 8 ounce package cream cheese
- 1/2 package (1/2 lb) chocolate bark (CandiQuick) (or about 1-1/2 cups chocolate chips)
- Mini chocolate chips for garnish
Brownie Base Preparation
First, let’s get that rich brownie base started. In a large bowl, combine your Duncan Hines Red Velvet cake mix with the melted butter and the two eggs. Mix everything together until it’s just combined. You don’t want to overmix at this stage, as that can lead to tough brownies. Once it’s mostly mixed, add the 6 tablespoons of vegetable oil. Stir gently until everything is incorporated and you have a thick, glossy batter. Now, we need to prepare your baking pan. I like to use an 8×8 inch square baking pan for these bars. It gives you a good thickness for both the brownie and the truffle layers. Line the pan with parchment paper, leaving some overhang on the sides. This makes it super easy to lift the whole thing out once it’s cooled. Pour the brownie batter into the prepared pan and spread it out evenly. Bake at 350°F (175°C) for about 20-25 minutes, or until a toothpick inserted into the center comes out with moist crumbs attached, not wet batter. You want it slightly underbaked so it stays fudgy.
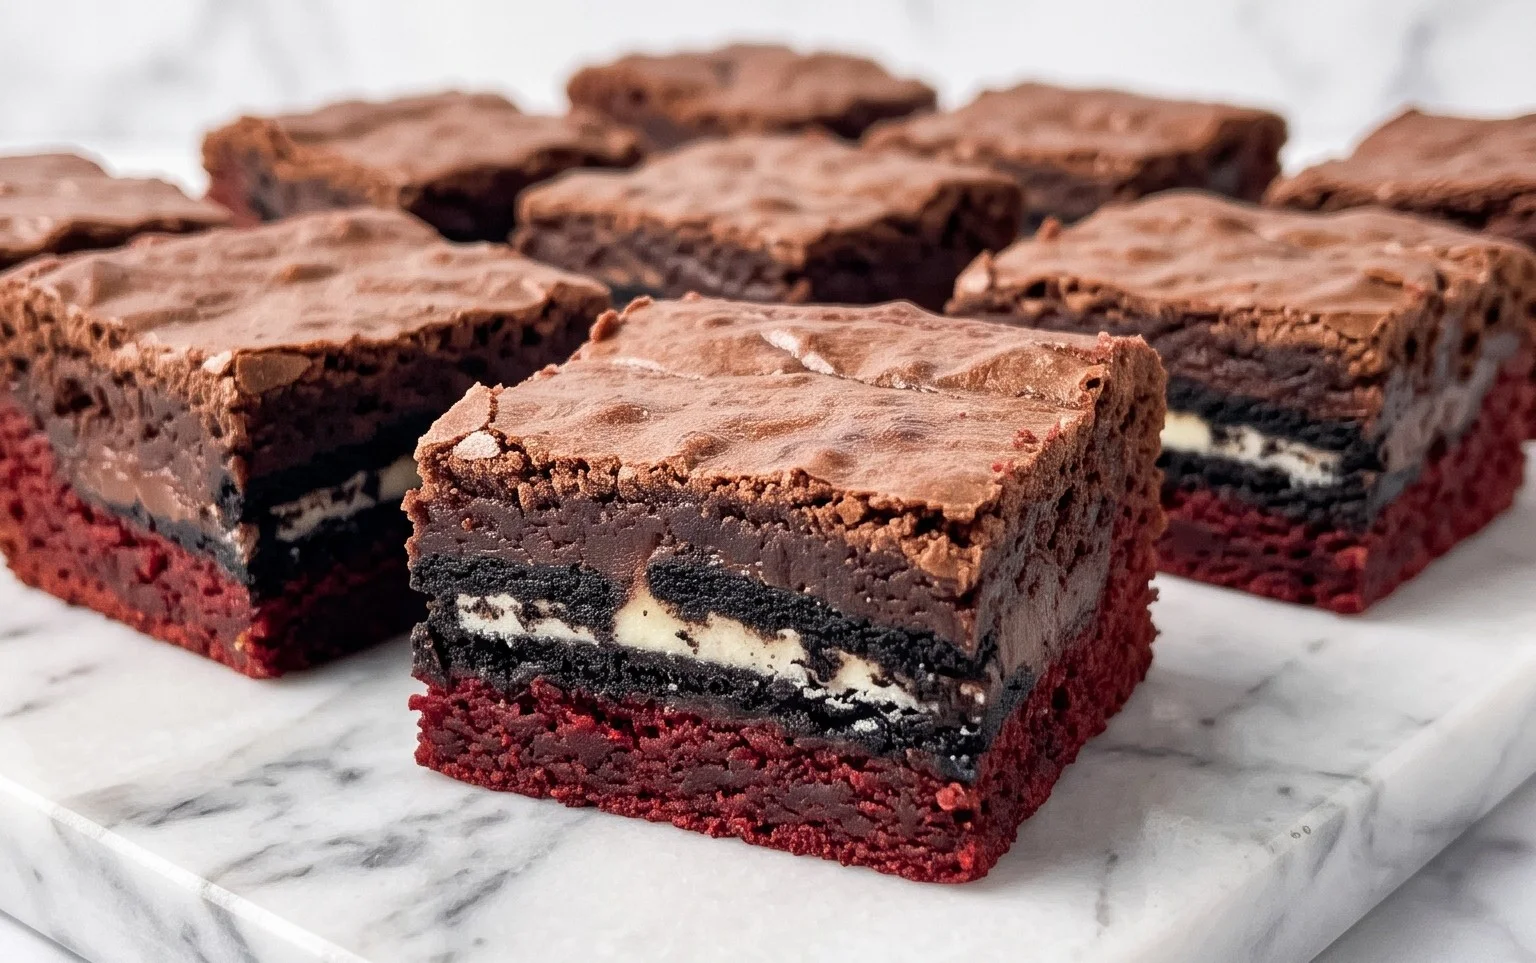
Red Velvet Oreo Truffle Brownie Bars
These bars start with a dense, fudgy brownie base, but we’re not stopping there. We’re layering on a creamy, dreamy white chocolate Oreo truffle filling, all topped off with a rich red velvet swirl and a sprinkle of mini chocolate chips for good measure. They’re the ultimate indulgence, perfect for parties or just treating yourself when only the best will do. The combination of the chewy brownie, the smooth truffle, and the distinct red velvet flavor is something special.
Ingredients:
- 1 Duncan Hines box Red Velvet cake mix
- 1/2 cup butter (melted)
- 2 eggs
- 1 package Jell-O instant white chocolate pudding (3.3 ounces)
- 6 tablespoons vegetable oil
- 1 package Oreos
- 8 ounce package cream cheese
- 1/2 package (1/2 lb) chocolate bark (CandiQuick) (or about 1-1/2 cups chocolate chips)
- Mini chocolate chips for garnish
Brownie Base Preparation
First, let’s get that rich brownie base started. In a large bowl, combine your Duncan Hines Red Velvet cake mix with the melted butter and the two eggs. Mix everything together until it’s just combined. You don’t want to overmix at this stage, as that can lead to tough brownies. Once it’s mostly mixed, add the 6 tablespoons of vegetable oil. Stir gently until everything is incorporated and you have a thick, glossy batter.
Now, we need to prepare your baking pan. I like to use an 8×8 inch square baking pan for these bars. It gives you a good thickness for both the brownie and the truffle layers. Line the pan with parchment paper, leaving some overhang on the sides. This makes it incredibly easy to lift the entire bar out once it’s cooled, preventing any sticking or breakage. Spread the brownie batter evenly into the prepared pan. You can use a spatula to get it nice and smooth, making sure it reaches all the corners.
White Chocolate Oreo Truffle Layer
While the brownie bakes, let’s get the star of the show – the white chocolate Oreo truffle filling – ready. Take your entire package of Oreos (about 36 cookies) and crush them. You can do this in a food processor until they’re fine crumbs, or place them in a zip-top bag and crush them with a rolling pin. You want them to be pretty fine so they blend smoothly into the filling.
In a separate bowl, make sure your 8-ounce package of cream cheese is softened. This is important for a smooth, lump-free filling. Add the crushed Oreos to the softened cream cheese. Then, add the contents of the Jell-O instant white chocolate pudding mix. Stir this mixture very well. You might need to use a sturdy spoon or even your hands for the last bit to ensure it’s all thoroughly combined. The mixture will be thick and sticky.
Assembling and Baking
Before you add the truffle layer to the brownies, we need to bake the brownie base for a short while. Pop that pan of brownie batter into a preheated oven at 350 degrees Fahrenheit (175 degrees Celsius) for about 15-18 minutes. We’re not cooking it all the way through; we just want it to set up slightly so it can hold the truffle layer without the two layers completely merging.
Once the brownie base has had its initial bake, carefully remove it from the oven. Evenly spread the white chocolate Oreo truffle mixture over the partially baked brownie base. Use a spatula or the back of a spoon to spread it out as evenly as possible. Try to get it right to the edges.
Now, put the pan back into the oven for another 20-25 minutes. You’ll know it’s done when the edges of the brownie are set and a toothpick inserted near the center comes out with moist crumbs attached, not wet batter. The truffle layer should also look set.
Cooling and Garnishing
Once baked, let the bars cool completely in the pan on a wire rack. This is a crucial step. Trying to cut them while they’re warm will result in a gooey mess. Patience is key here! Allow them to cool for at least 2-3 hours, or even pop them in the refrigerator for an hour to speed up the process.
Once cooled, it’s time for the final touch. Melt your chocolate bark or chocolate chips. If using chocolate bark, follow the package instructions, usually by melting it gently in the microwave in short intervals, stirring between each. If using chocolate chips, you can melt them in a microwave-safe bowl in 30-second bursts, stirring until smooth.
Once the chocolate is melted and smooth, drizzle it generously over the cooled bars. Immediately sprinkle the mini chocolate chips over the melted chocolate before it sets. This adds a lovely textural contrast and visual appeal. Again, allow the chocolate to set completely before slicing. You can speed this up in the refrigerator.
Slicing and Serving
For clean cuts, use a sharp knife dipped in hot water and wiped dry between each cut. This will give you neat slices of your delicious Red Velvet Oreo Truffle Brownie Bars. These bars are best served at room temperature or slightly chilled. They store well in an airtight container in the refrigerator for up to 3-4 days. Enjoy this decadent treat!
Conclusion:
These Red Velvet Oreo Truffle Brownie Bars really are a dessert triumph. You get that satisfyingly dense brownie base, a creamy, luxurious white chocolate Oreo truffle layer, and the distinct tang of red velvet all in one bite. They look impressive, but they’re totally manageable to make, and the payoff in flavor is huge. I love making these for potlucks because they always disappear fast. For serving, I usually cut them into squares and let them sit at room temperature for about 20 minutes before serving so the truffle layer is perfectly soft.
Thinking about variations? You could swap the white chocolate pudding for vanilla instant pudding in the truffle layer, or use a different kind of cookie, like Golden Oreos. For an extra punch, drizzle some melted dark chocolate over the top along with the mini chocolate chips. You could also try a different cake mix flavor for the brownie base, though Red Velvet really makes these special. Don’t be afraid to experiment!
FAQs:
Can I make these ahead of time?
Yes, absolutely! These bars are fantastic made a day or two in advance. Store them in an airtight container at room temperature. The flavors actually meld together nicely overnight.
How should I store leftovers?
Leftover bars should be stored in an airtight container. If your kitchen is warm, you might want to keep them in the refrigerator, but let them come to room temperature for about 20 minutes before eating for the best texture.
Can I use regular chocolate chips instead of bark?
You sure can. If using chocolate chips, melt them gently with a tablespoon of vegetable shortening or coconut oil, stirring until smooth. This helps them set up a bit better than just plain melted chips.
Red Velvet Oreo Truffle Brownie Bars
Decadent brownie bars layered with red velvet cake, creamy Oreo truffle filling, and a rich chocolate coating, garnished with mini chocolate chips.
Ingredients
-
1 Duncan Hines box Red Velvet cake mix
-
1/2 cup butter, melted
-
2 eggs
-
1 package Jell-O instant white chocolate pudding (3.3 ounces)
-
6 tablespoons vegetable oil
-
1 package Oreos
-
8 ounce package cream cheese, softened
-
1/2 package (1/2lb) chocolate bark (CandiQuick)
-
mini chocolate chips for garnish
Instructions
-
Step 1
Preheat oven to 350°F (175°C). Grease and flour a 9×13 inch baking pan. -
Step 2
Prepare the red velvet brownie batter: In a large bowl, combine the red velvet cake mix, melted butter, and eggs. Mix until just combined. Stir in the vegetable oil and instant white chocolate pudding mix until smooth. -
Step 3
Pour half of the brownie batter into the prepared baking pan. Bake for 15-20 minutes, or until a toothpick inserted into the center comes out with moist crumbs. -
Step 4
While the brownie bakes, make the Oreo truffle filling: Crush the Oreos into fine crumbs. In a medium bowl, combine the Oreo crumbs with the softened cream cheese. Mix until well combined and smooth. Roll into small balls and place on a parchment-lined baking sheet. -
Step 5
Once the brownie is partially baked, remove it from the oven. Carefully arrange the Oreo truffle balls over the brownie batter. Pour the remaining brownie batter over the truffle balls, ensuring they are mostly covered. -
Step 6
Bake for another 15-20 minutes, or until a toothpick inserted into the center comes out clean. Let cool completely in the pan. -
Step 7
Once cooled, melt the chocolate bark according to package directions. Pour the melted chocolate over the cooled brownies and spread evenly. Garnish with mini chocolate chips before the chocolate sets. -
Step 8
Cut into bars and serve.
Important Information
Nutrition Facts (Per Serving)
It is important to consider this information as approximate and not to use it as definitive health advice.
Allergy Information
Please check ingredients for potential allergens and consult a health professional if in doubt.